
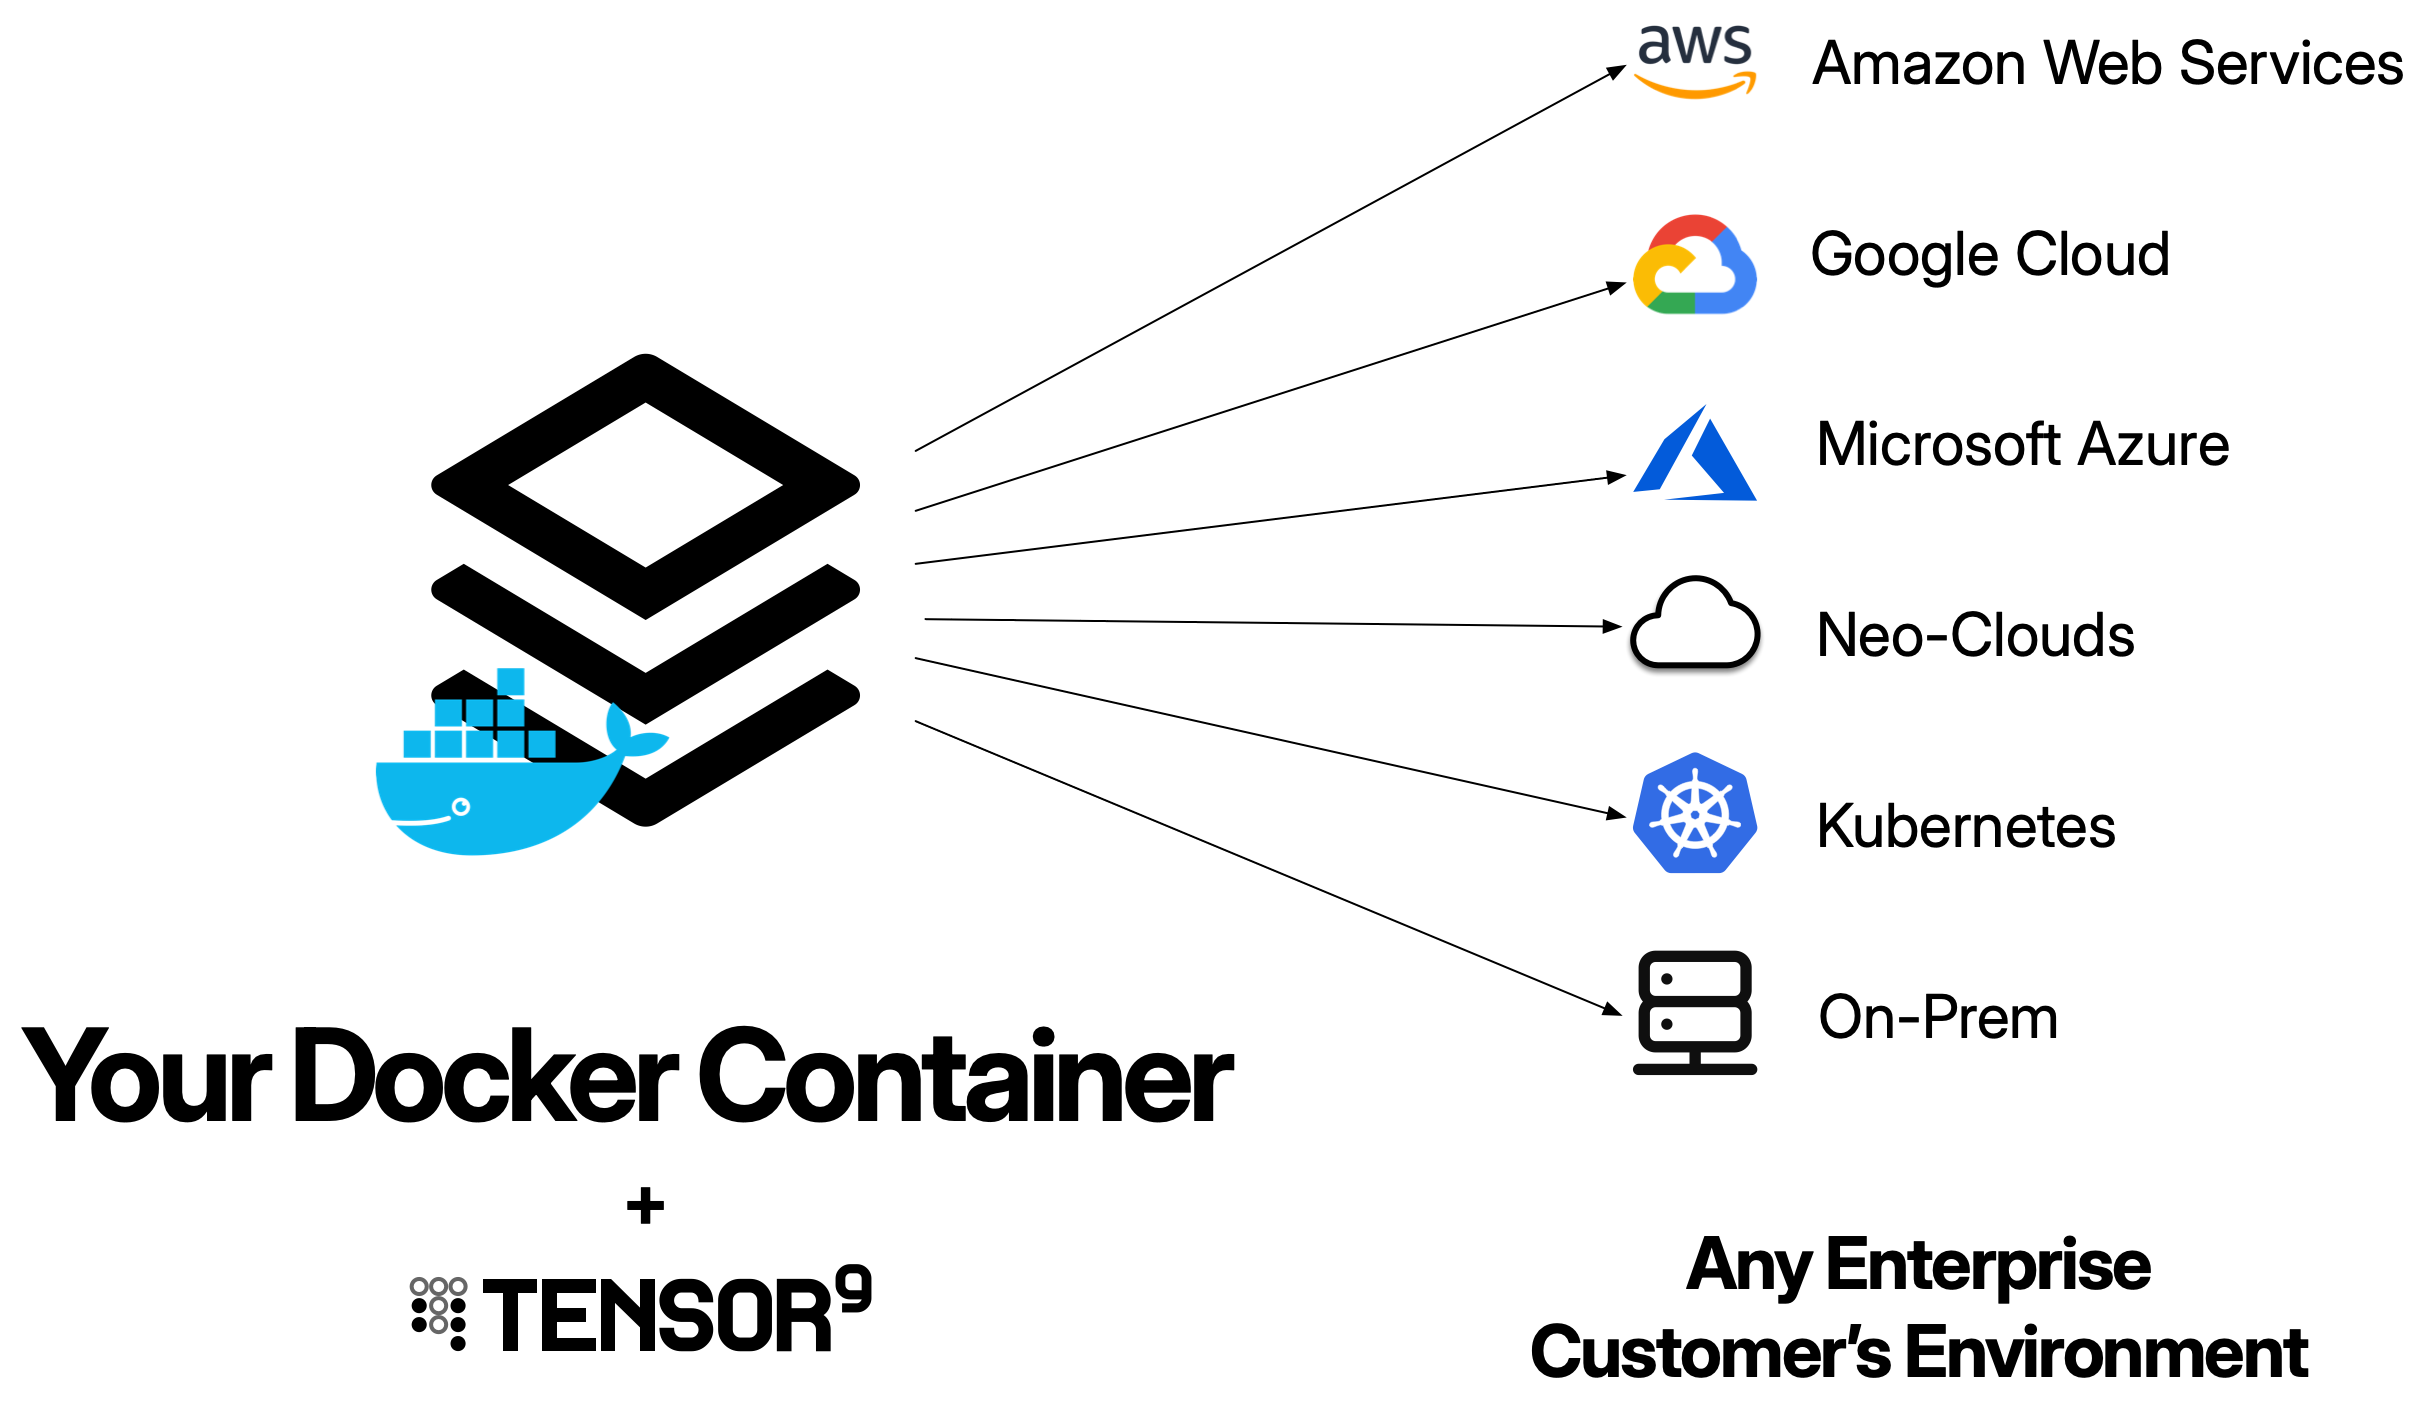
- Set up a Tensor9 control plane in your AWS account, create a Tensor9 app, and bind your Docker container as the origin for that app. In this guide, we use Nginx as an example app.
- Test your app running natively in AWS before rolling it out to customers.
- Try the customer click-to-install experience.
- Explore your control plane in the AWS Console that allows you to observe and operate all customer appliances.
- Deploy code changes and monitor them rolling out to customer appliances.
Prerequisites
- Send an email to [email protected] and request an API key. You must have an API key to complete the quick start.
-
Create an AWS account for Tensor9. We will refer to this as the Tensor9 AWS account.
Important:
- Your Tensor9 AWS account should be a dedicated AWS account used only for Tensor9. This reduces the risk of conflicts between your app deployed in a Tensor9 appliance and any other software, infrastructure, or resources you might have in a general-purpose AWS account.
- Your Tensor9 AWS account must be located in a United States region. Support for non-US regions will be available in the near future.
Launch an AWS EC2 instance
To use the Tensor9 CLI, you need to set up an AWS EC2 instance.- Go to your AWS EC2 dashboard.
- Select any United States region. (Note: Support for other regions is coming soon.)
- Click the Launch instances button.
- Provide a name for your new instance.
- Under Application and OS images, choose your desired configuration.
- Select a new or existing Key pair to log in via SSH, if needed. (You can alternatively access your instance via Session Manager.)
- Review the Network settings section. These can be left at their defaults in most environments, but you can customize them, if needed.
- In the **Configure storage section, increase your storage to at least 20GB.
- Under Advanced details, select an IAM instance profile that has the AdministratorAccess policy assigned to the role. If you do not have such a profile:
- Click the Create new IAM profile link, then click the Create role button.
- Select EC2 as Service or use case.
- Search for and select AdministratorAccess to add the policy to the role.
- Name the role and click Create Role.
- Return to your Launch an instance tab and select the new instance profile that you just created.
- Click Launch instance.
Install the Tensor9 CLI
- Connect to your new AWS EC2 instance.
- Install Java 17 or later. On Ubuntu, use
apt:
sudo apt install openjdk-21-jdk
- Install the AWS CLI.
- Install the Tensor9 CLI:
- Set your Tensor9 API key:
export T9_API_KEY=<YOUR_API_KEY>
Note: An API key is required. If you do not have an API key, send email to [email protected] to request one.
Set up a Tensor9 control plane and Docker container
- Set up a Tensor9 control plane in your new AWS account (this takes several minutes to complete):
- Create a new Tensor9 app. As an example, we use Nginx:
tensor9 app create -name nginx-example -displayName "Nginx example app"
Note: The length of the displayName field must be 32 characters or fewer.
- Install Docker, if it is not already installed:
sudo apt install docker.io
- Verify that Docker is running:
sudo docker version
- Prepare a docker container with your app. In this example, we download Nginx:
sudo docker pull nginx
- Push your container to a repository in the Elastic Container Registry (ECR) in your Tensor9 AWS account. For more information and for a list of push commands, go to your list of private repositories, click a repository link, and then click the View push commands button.
build step, but because you are pulling down an existing Docker container for Nginx, you do not need to complete the build step. The build step is only required if you are building your own container. If you are building your own container, make sure the container supports the linux/amd64 architecture.
- Bind your container as your new origin stack:
<YOUR_TENSOR9_AWS_ACCOUNT_ID>.dkr.ecr.<YOUR-REGION>.amazonaws.com/<IMG_NAME>:<IMG_TAG>
Create a Tensor9 test appliance and test your app
- Create a test appliance:
- View the output of
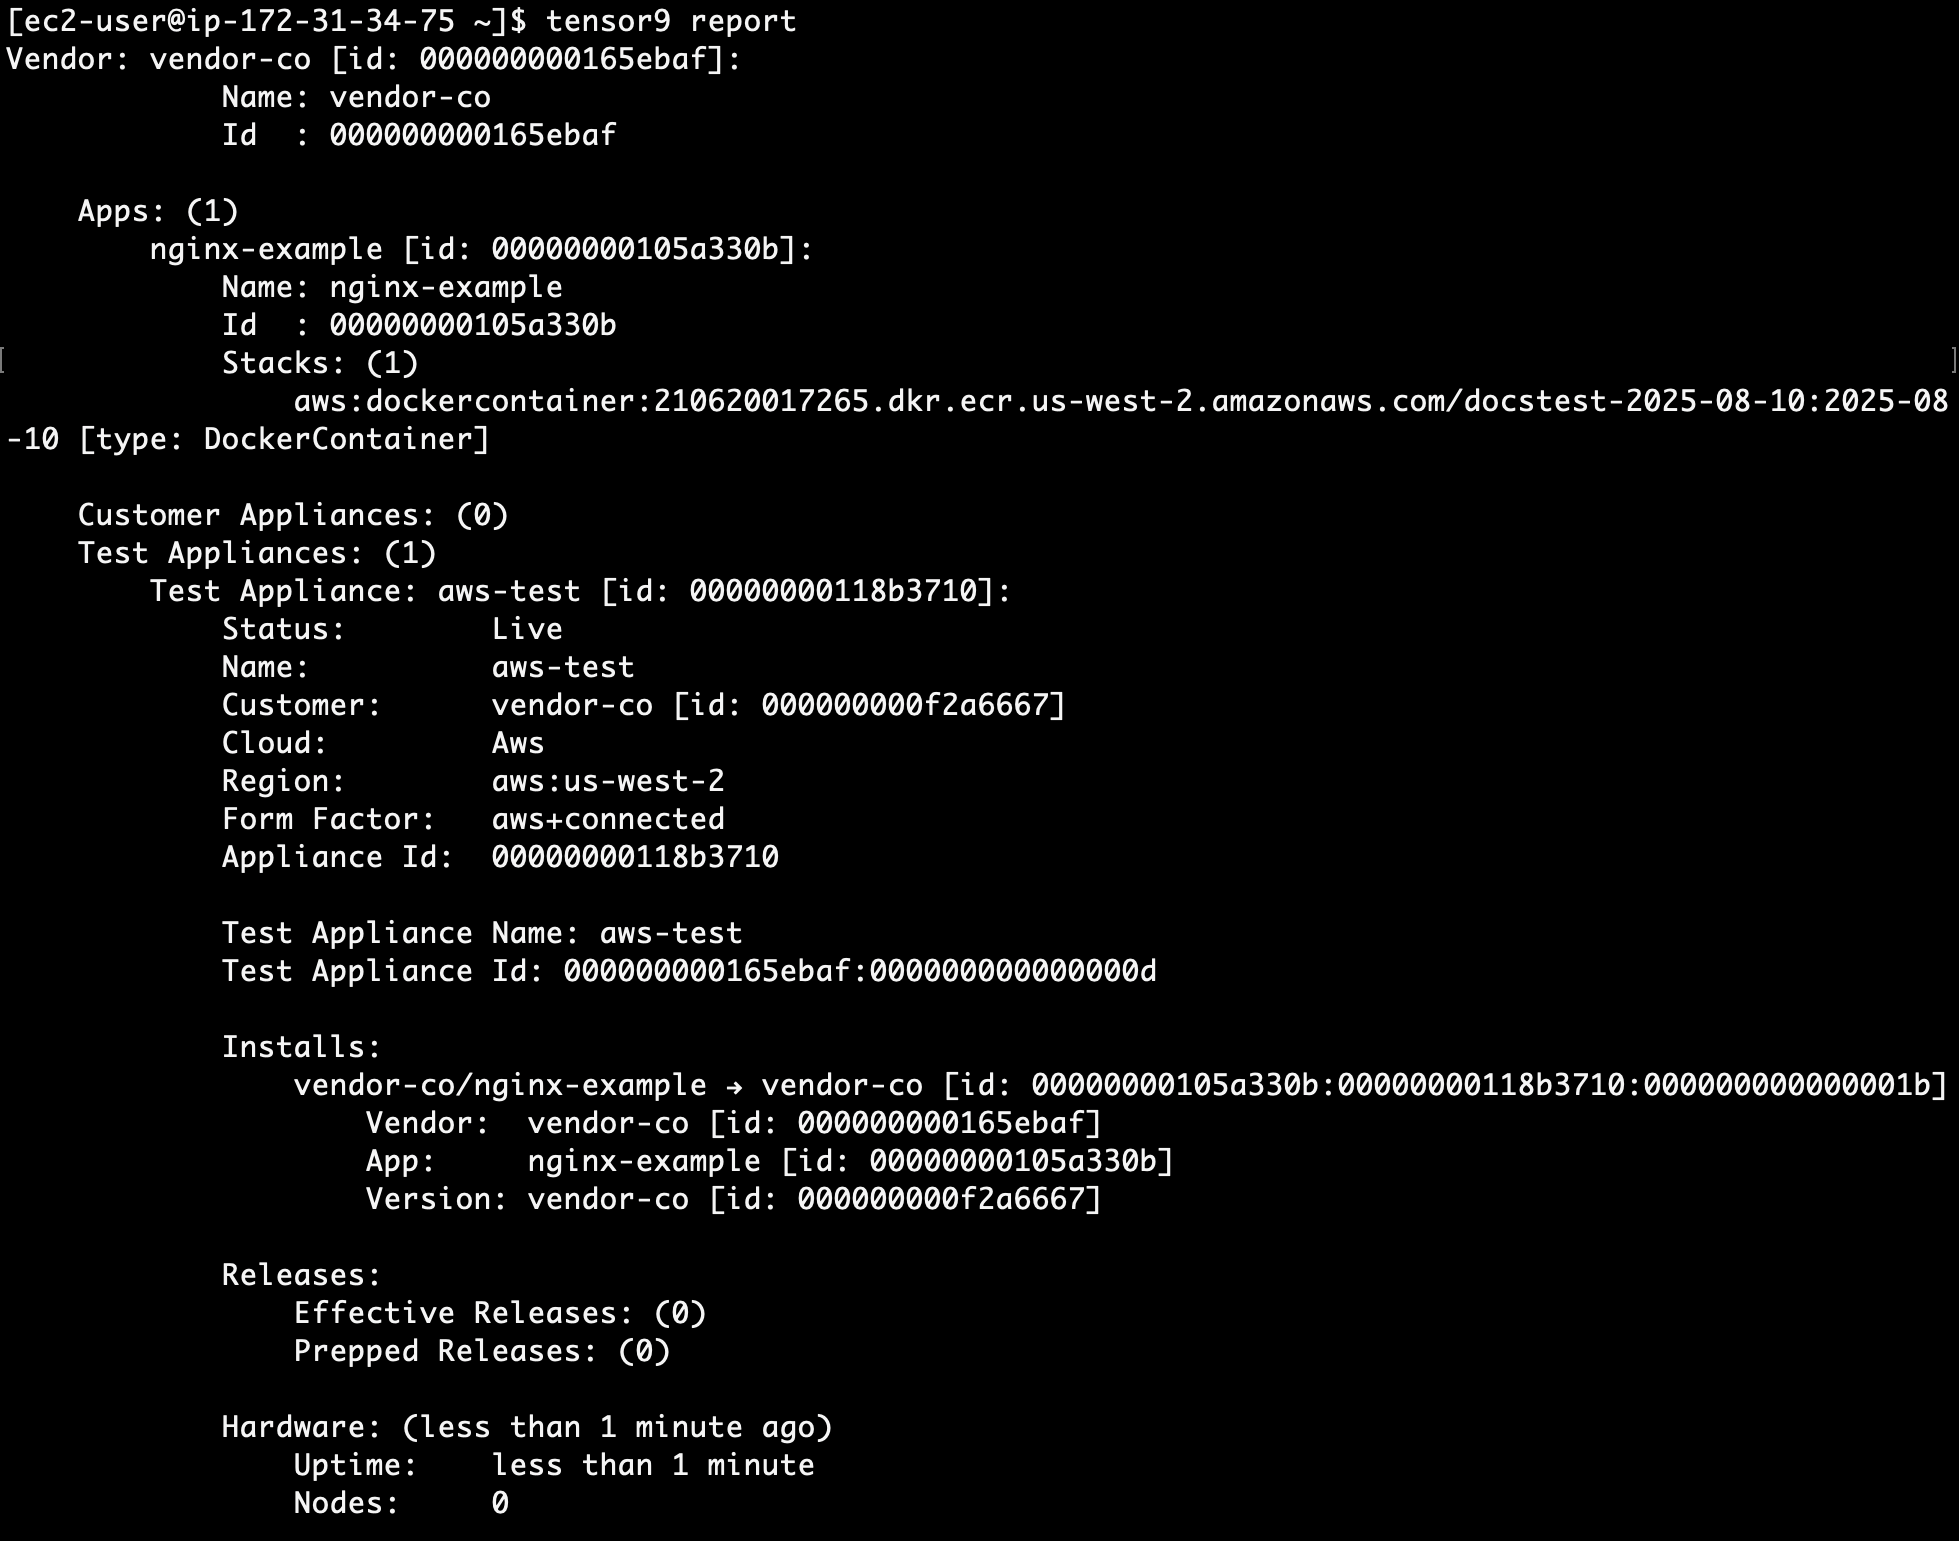
tensor9 reportto determine when your test appliance is ready for a release. While the test appliance is creating,tensor9 reportdisplays output such as:

tensor9 report displays output such as:
- Create a release to your test appliance:
- After a few minutes, go to the AWS CloudFormation Console in your region and search for your test appliance name. This is the deployment stack for your test appliance.
- Select the deployment stack, then click Events and Timeline View. This view shows the deployment timeline of your stack to your test appliance.
- Wait several minutes for the deployment to complete.
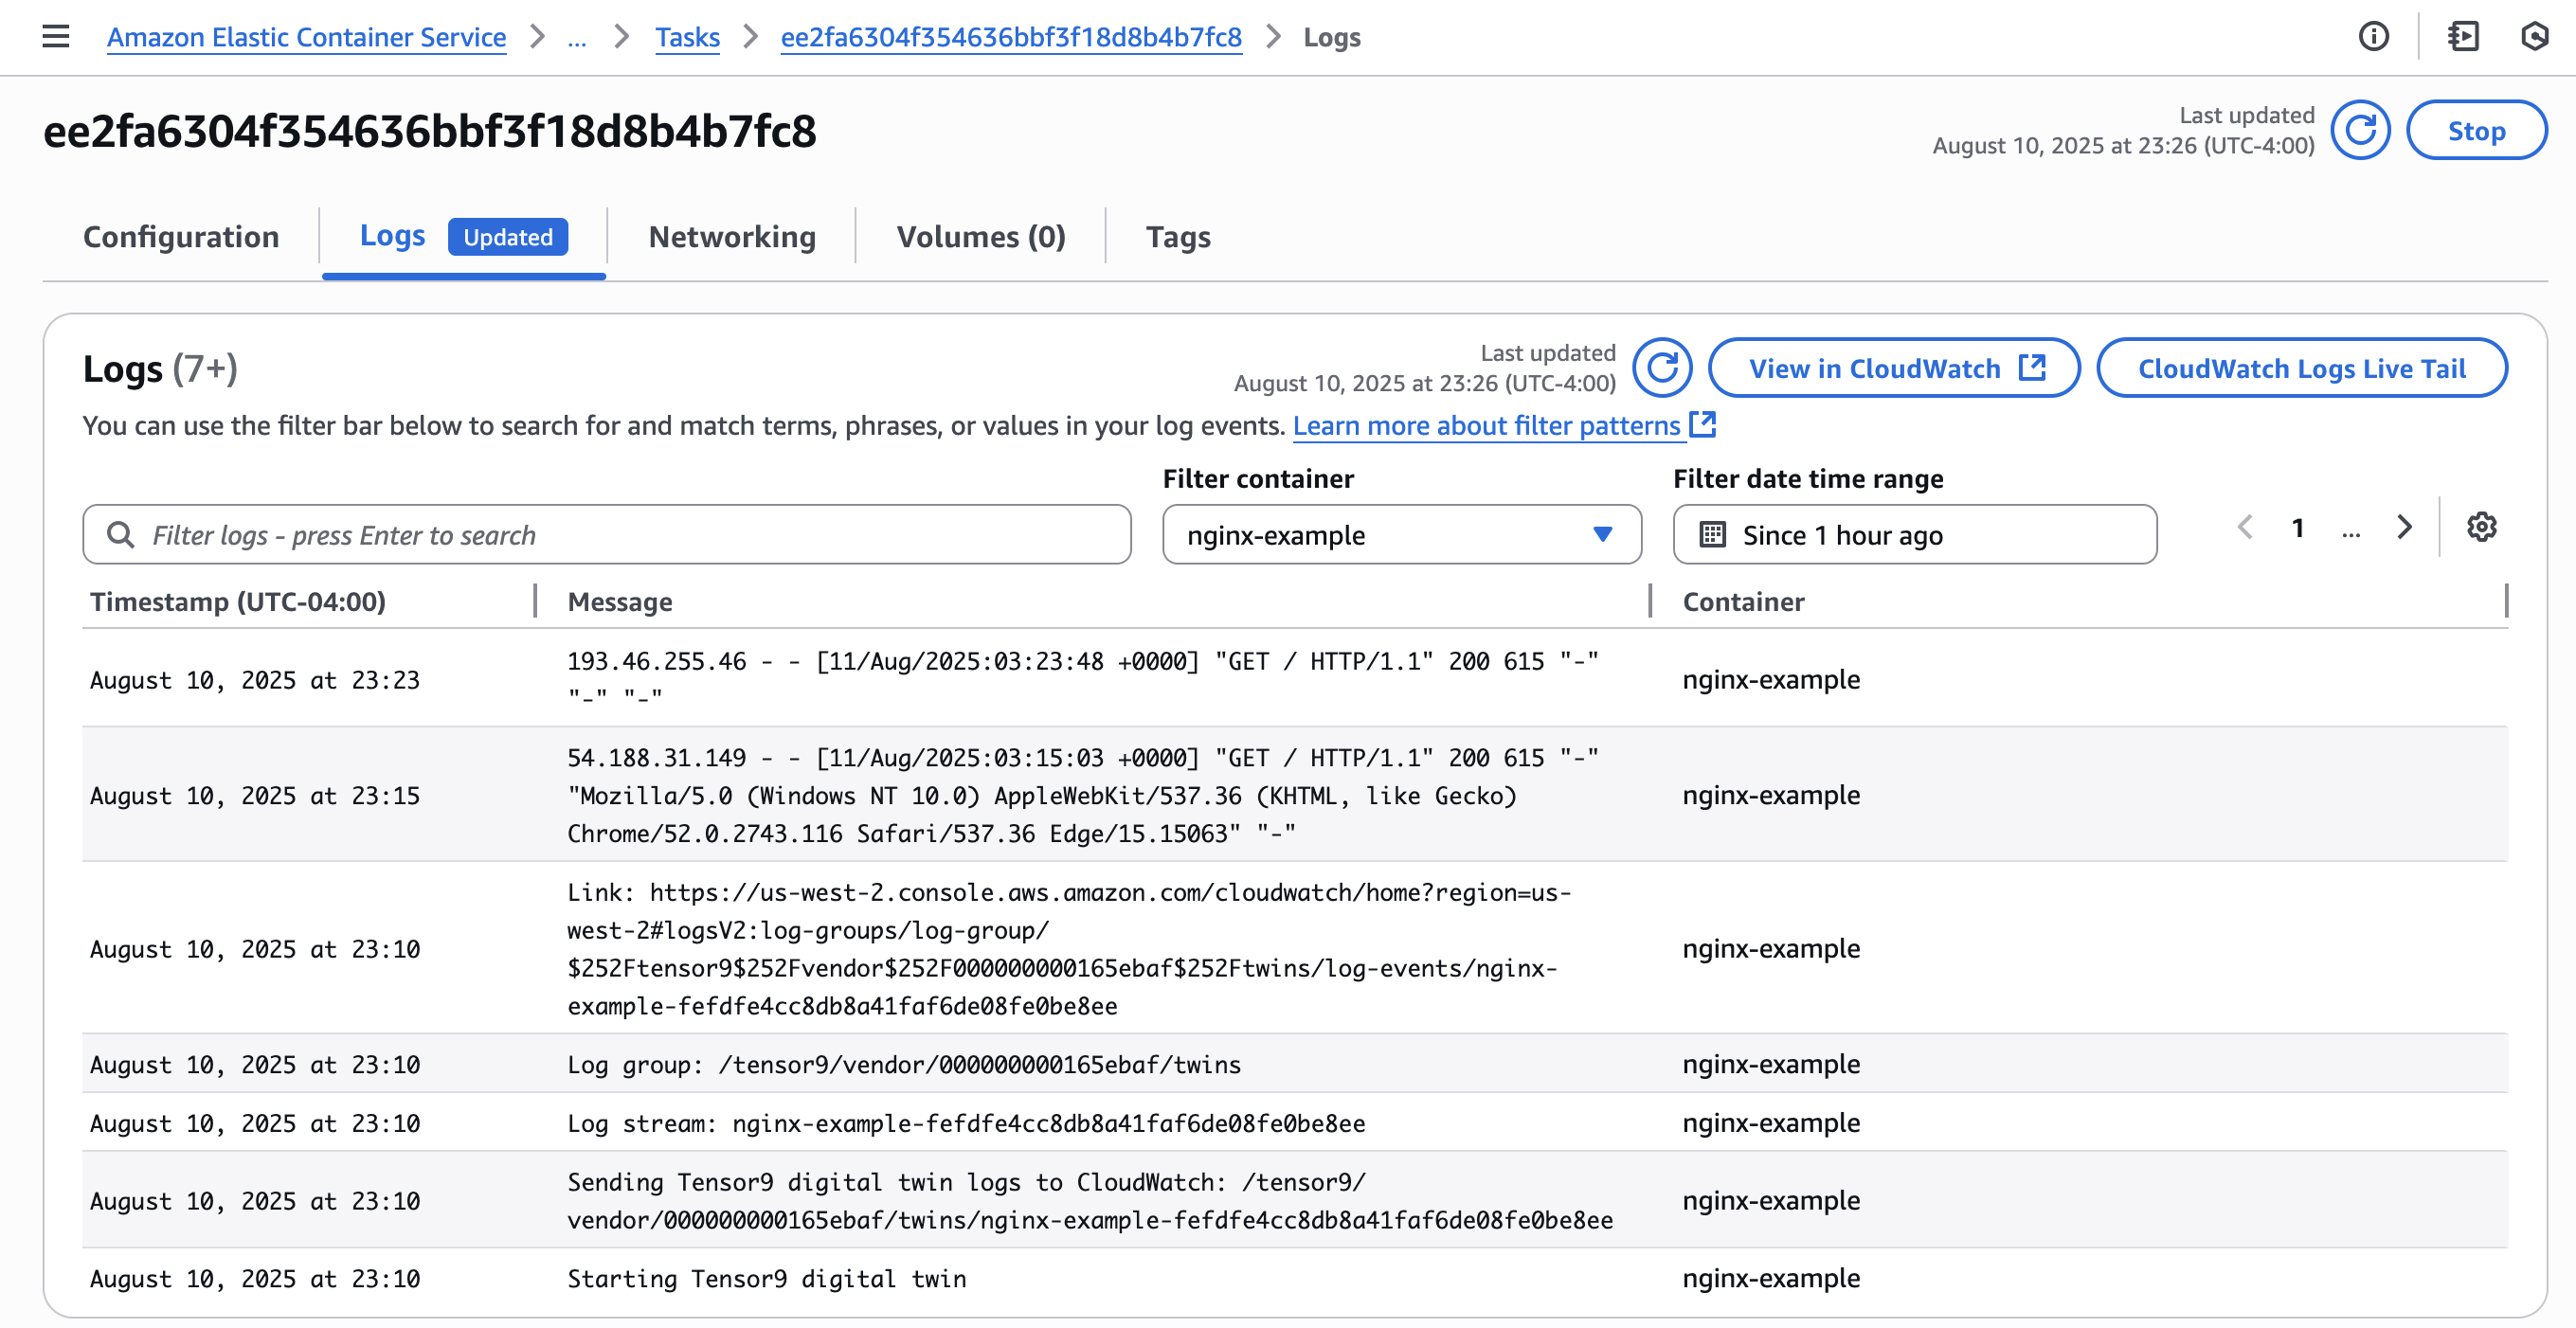
- Click the Resources tab. Search for ECSCluster to find the ECS cluster resource in your test appliance’s deployment stack.
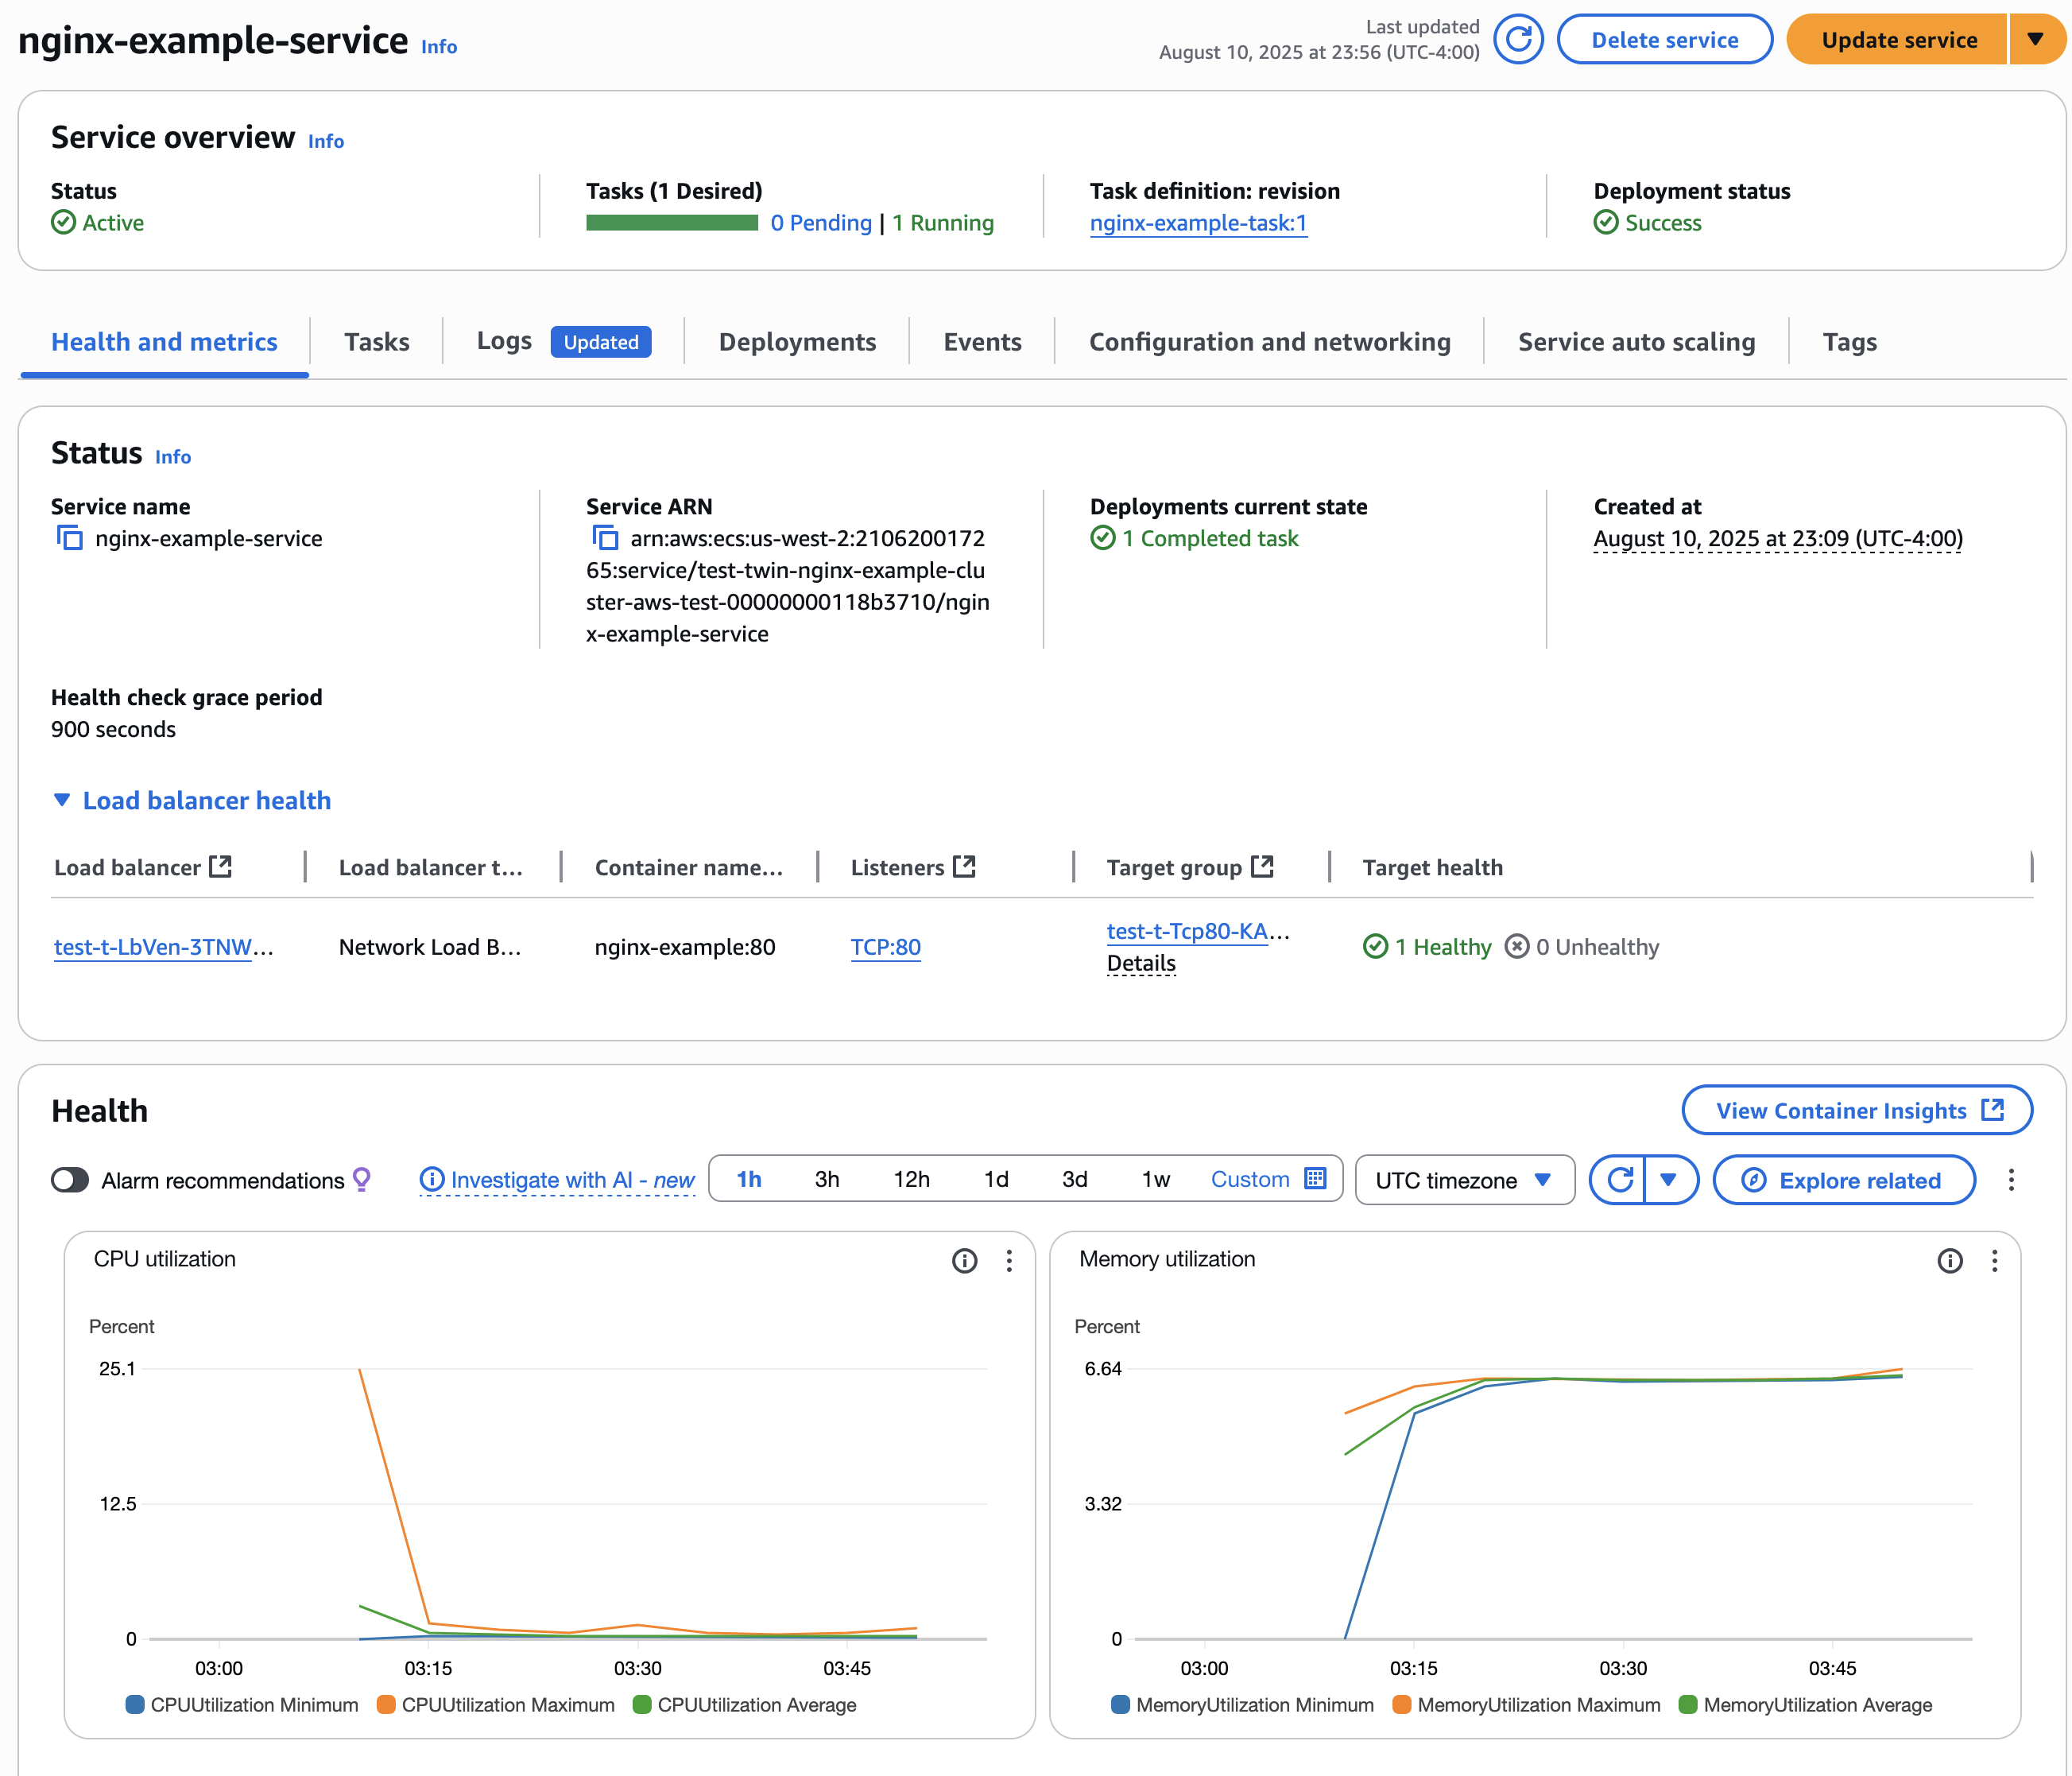
- Click the link in the Service name column. Here you can explore deployments, see which containers are running, and view logs and metrics.
- Run
tensor9 reportto find the DNS name of your appliance. The output has a line labeled DnsNameForLbAppliance, which is the DNS name. - Visit
http://<DNS_NAME>to verify that Nginx is working.
Testing the customer install process
As a vendor providing services to customers, you can test your environment by going through the process of installing your app from the perspective of a customer.- Create a separate AWS account to simulate your customer.
- Log into the AWS console as your simulated customer. Verify that you have admin permissions.
- Create a customer signup link:
tensor9 app signup-link -appName nginx-example
- Visit the signup link in the same browser window that you used to log into the AWS console as a simulated customer. A signup screen displays and prompts you for your company information and email address.
- Enter an email address and a company name, such as [email protected] and ExampleCompany.
- Click the link to start the install process and provision infrastructure. Wait approximately 10 minutes for the infrastructure to finish provisioning.
Explore your control plane in AWS
AWS is your control plane for all your customer appliances. You can view the status of your customer appliances in AWS.- Visit the deployment stack for a customer appliance by searching for your customer name in the AWS CloudFormation console. Two deployment stacks are displayed: One for your test appliance and the other for your customer appliance.
- Click the link to the customer app deployment stack.
- Click the Resources tab, search for “service”, then click the Service link to view the ECS cluster for your customer.
- Run
tensor9 reportand look for a line labeled DnsNameForLbAppliance in the Customer Appliances section of the output. This is the DNS name for the customer appliance. For example,nginx--LbApp-tAUAT8tDV5hn-0c7199c912e8827d.elb.us-west-2.amazonaws.com. - Visit
http://<DNS_NAME_FOR_LB>:80to use Nginx as if you were the customer.
Release a code change
At any time, you can make a code change, build the latest container, and push it to Elastic Container Registry in your Tensor9 AWS account using the same Docker image tag you used to deploy the container. Important: Verify that your container supports the linux/amd64 platform.- Retire the current release:
- Create a new release:
-vendorVersion than the currently deployed app.
- Inspect your customer’s deployment stack in the AWS CloudFormation console to find the ECS cluster. A recent blue or green deployment for your change appears. The old software will not be turned off until the new software is up and passing health checks.
- Run
tensor9 reportand look for a line labeled DnsNameForLbAppliance in the Customer Appliances section. This is the DNS name for the customer appliance. For example,nginx-LbApp-6SOn9F6auFHS-bb813efec3dd0c2c.elb.us-west-2.amazonaws.com. - Visit
http://<DNS_NAME_FOR_LB>:80to test Nginx on the customer appliance and verify that your code changes were applied.